Additional features
This article is part of a tutorial about creating an outbound call campaign using CAILA.
- Telephony setup
- Script setup
- Campaign launch
- Analytics
- Additional features (you are here)
- Testing
During this step, we will improve the script of our call campaign with the following features:
Callback
It often happens that clients are busy when the call reaches them, so it has to be rescheduled for a later time.
Intent configuration
First of all, you should support the appropriate intent in CAILA.
- Go to CAILA > Entities > System entities and enable the
@duckling.timeentity for time recognition. - Go to CAILA > Intents and create a new
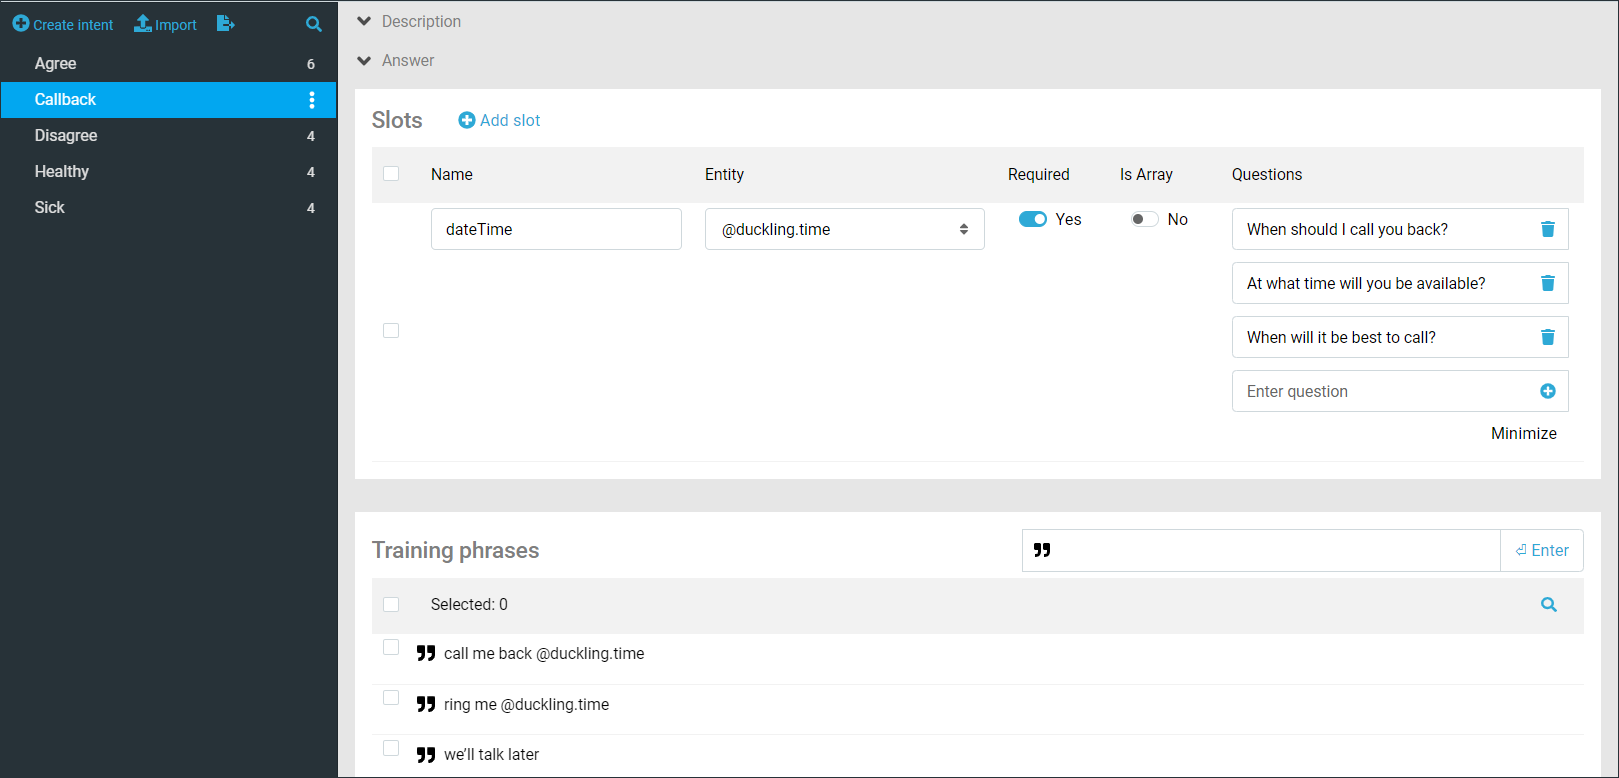
/Callbackintent with the following setup:

Training phrases should include examples with the time provided as well as without. Use the system entity name @duckling.time as a placeholder instead of actual time.
Next, activate slot filling for this intent. Add one required slot, dateTime, corresponding to the @duckling.time entity, and add some clarifying questions such as the following:
- When should I call you back?
- At what time will you be available?
- When will it be best to call?
Being required, the handler of this intent is guaranteed not to trigger until the client has specified when to call back.
Slot filling configuration
Go to the script editor. Open the chatbot.yaml configuration file and add an injector field containing slot filling interruption settings:
injector:
  slotfilling:
    maxSlotRetries: 3
    stopOnAnyIntent: false
    stopOnAnyIntentThreshold: 0.2
In this case, maxSlotRetries: 3 means that the bot will inquire about the time twice if unable to recognize it in the client’s responses. If the client does not mention it for the third time in a row, slot filling will get interrupted, and the request will activate the /Symptoms/Unrecognized state via the event!: noMatch activator.
Slot filling interruption by intent does not matter for this script much, since there are no other states with global activators present. Therefore, stopOnAnyIntent and stopOnAnyIntentThreshold parameters are set to their default values.
Script expansion
Now we can import the slot filling module into main.sc and create an appropriate new state in the main theme:
require: slotfilling/slotFilling.sc
    module = sys.zb-common

theme: /

    state: Callback
        intent!: /Callback
        a: Okay, I’ll call you back later!
        script:
            $dialer.setCallResult("Callback request");
            $dialer.redial({startDateTime: new Date($parseTree._dateTime.timestamp)});
        go!: /Goodbye
The $dialer.redial method will schedule a new call at the preferred time and include it into the call campaign.
Barge-in
It is not always wise to wait until the bot has finished speaking to allow the client to reply back. You can enable barge-in so the client can interrupt the bot mid-sentence.
In between the slot filling module requirement and the main theme declaration, add an init section with a postProcess handler:
init:
    bind("postProcess", function(ctx) {
        ctx.response.bargeIn = {
            bargeIn: "forced",
            bargeInTrigger: "interim",
            noInterruptTime: 1000
        };
    }, "/");
Here:
bargeIn: "forced"means that after being interrupted, the bot will not attempt to finish the speech and stop at once.bargeInTrigger: "interim"is the interruption mode with intermediate speech recognition results available;noInterruptTimeset to 1,000 milliseconds means that during the first second since the bot has started talking, interruption is impossible. This is often useful against random background noise.
The postProcess handler here is bound to the root theme, i.e. all the existing states. For a more fine-grained barge-in setup, use the $dialer.bargeInResponse method.
Audio playback
You can use pre-recorded audio files as bot replies — for example, if you want to use your own speaker’s voice recordings instead of synthesized speech. The audio tag is used for audio playback.
Suppose we have recorded the phrase I’m sorry, there’s something wrong with the connection and stored the audio file at https://example.com/comms-issue.wav. Then the line
a: I’m sorry, there’s something wrong with the connection.
in the /NoInput state should be replaced with
audio: https://example.com/comms-issue.wav
Lastly, let’s move on to testing the script you have developed.