Google Assistant
Google Assistant is a Google voice assistant available for different devices, such as smartphones, smart speakers, TVs, cars, etc.
What are Actions?
Besides the out-of-the-box functions, Google Assistant can run programs created by third-party developers. These programs are called Actions.
Any Action can be invoked using a phrase pre-determined by the developer in the Actions console. These phrases are defined at the project registration stage. When the client pronounces the phrase, Google Assistant will switch them to the dialog with the bot.
With Aimylogic, you can turn your chatbot into an Action for Google Assistant.
How to create an Action for Google Assistant
Connect to the Google Assistant channel
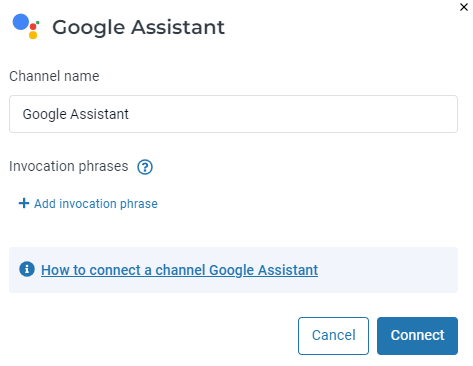
Go to the Channels tab of your bot and choose Google Assistant from the list.
In the pop-up window, you can change the channel name. It does not affect anything on the client’s side and is required only for internal use. You can also add an invocation phrase. Click Connect.
Download Action Package
After you have clicked Connect on the previous step, Google Assistant will be added to the list of your bot’s channels.
Click Download action.json to download the JSON file of your Action Package.
You will need this file when setting up the integration.
Add your Action in the Actions Console
Log in to Actions Console and click New project.
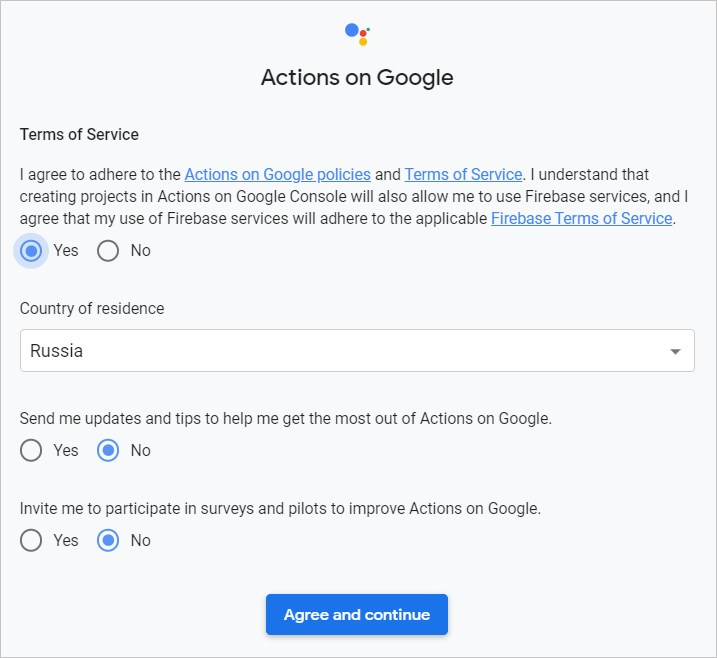
In the modal window, accept Terms of Services, specify your country of residence, and specify whether you want to receive newsletters from Google or not. Click Agree and continue.
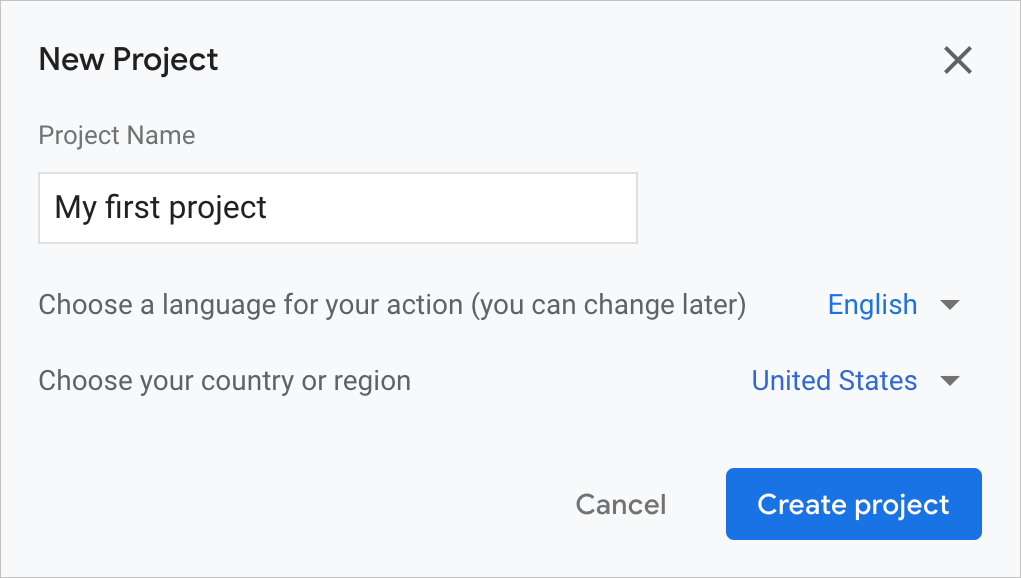
In the modal window, enter the project name, select the country from the list, and specify the language for your Action. Click Create project.
Select your Action category and click Next or Start building depending on the category you have chosen. Choose a subcategory if it is needed. After doing that, you will be transferred to the page with the list of your projects.
Set the invocation phrase
Go to your project.
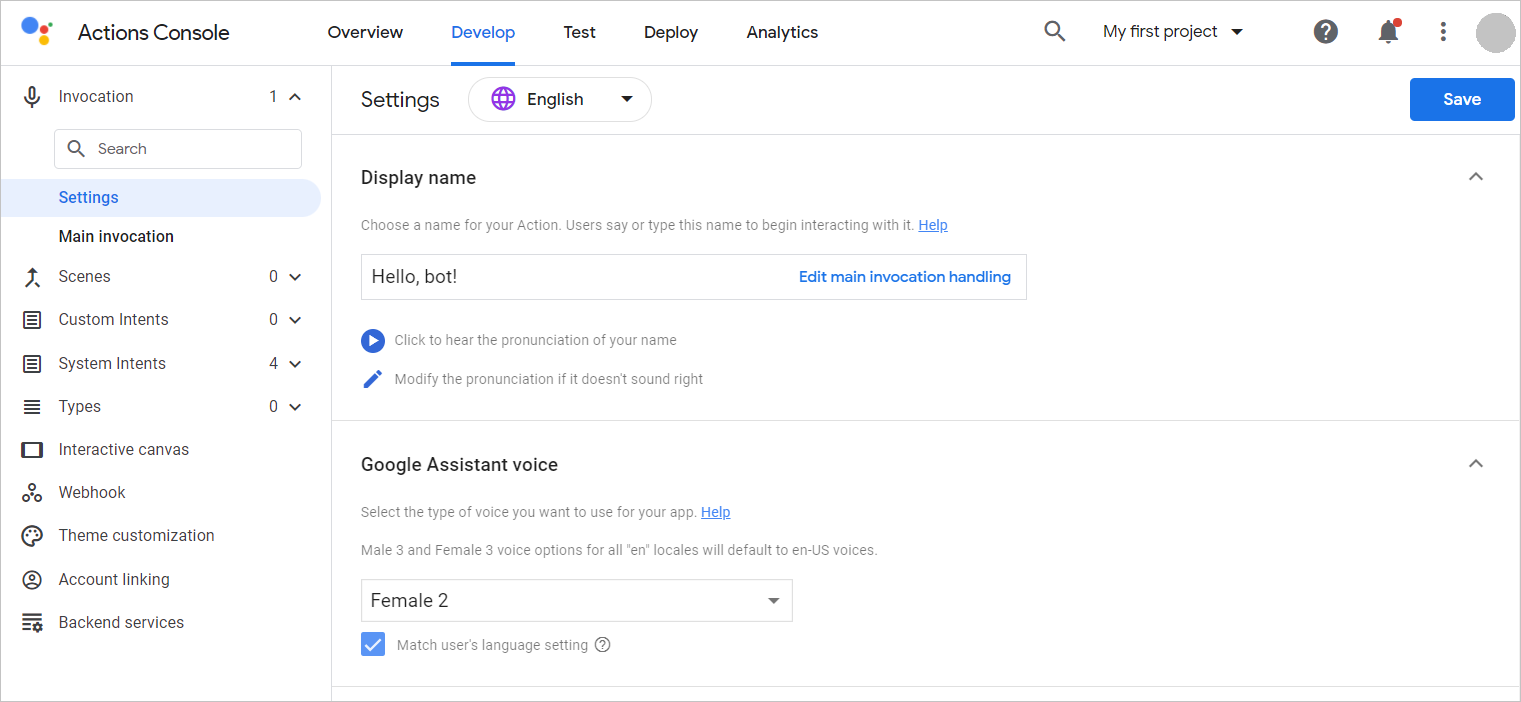
Expand the Build your Action menu → Add Action (s). Select Invocation in the sidebar.
Specify the phrase that will invocate your Action. Choose the voice for your Action and save the changes.
Copy the Project ID
Go to your project settings and find the Project ID field.


Copy and save it. You will need it later.
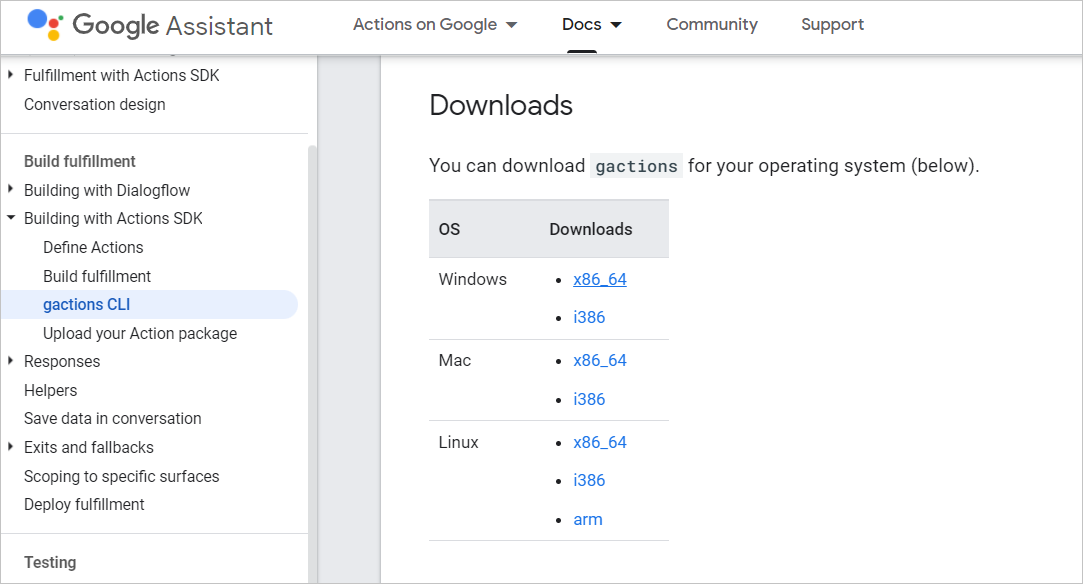
Download gactions
Download gactions for your operating system to the directory where your JSON file is kept.
Load Action Package into the project
If you are using macOS, go to the article on uploading Action Package on macOS and then follow the next step.
If you are using Windows, open the console. To do this, press Win + R, enter cmd, and click OK.
In the console, go to the directory that contains a gactions file and a JSON file with your Action Package. To do this, enter cd and specify the pathway to the directory, e.g.:
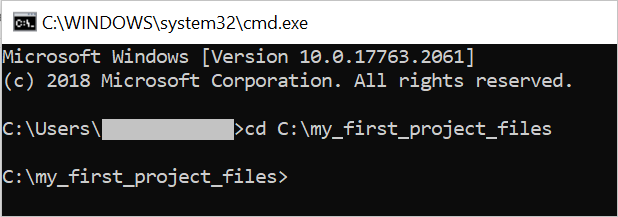
Then run the following command:
gactions update --action_package PACKAGE_NAME --project PROJECT_ID
- Replace
PACKAGE NAMEwith the name of the JSON file you have downloaded earlier. - Replace
PROJECT_IDwith the ID of your project you have copied from the project settings.
The command example:
gactions update --action_package my_first_project-121976680-uiw.json --project my-first-project-e2d30
You might have to update gactions:
Enter y and press Enter to install the updates.
Run the following command again:
gactions update --action_package PACKAGE_NAME --project PROJECT_ID
Give permissions
From gactions, you will get a URL. Copy and paste it in the browser.

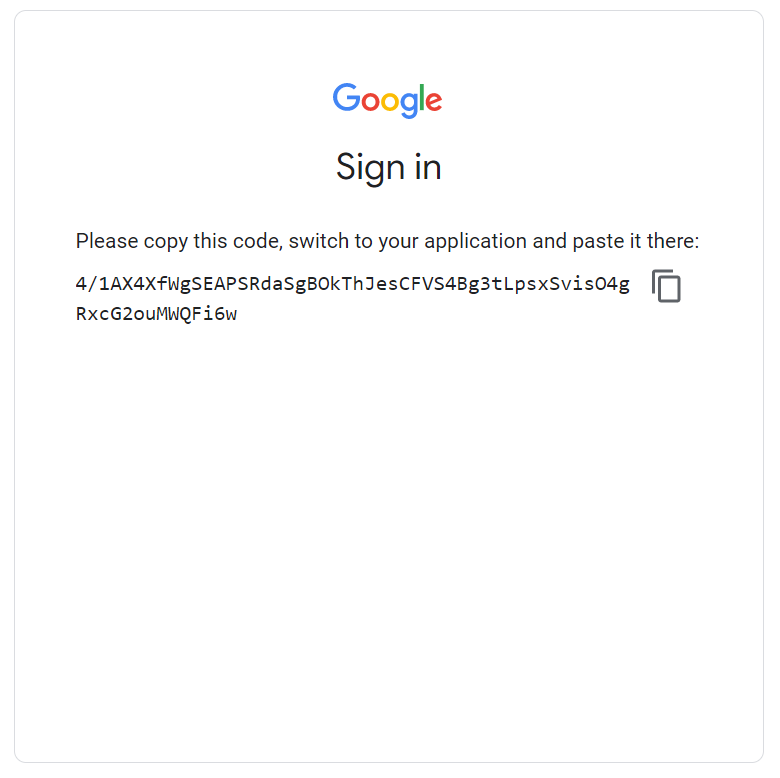
In the browser, you will see a page where you have to choose a Google account and give permissions to access your projects. Choose the account you have used for your project in the Actions Console. Click Allow.
You will get the authorization code. Copy it using the icon and paste it into the console, then press Enter.
Complete the Action creation
In the console, you will see the message that your Action has been successfully updated:
Your app for the Assistant for project… was successfully updated with your actions. Visit the Actions on Google console to finish registering your app and submit it for review at https://...

Now you can close the console.
Give Google Account permissions
Before testing your Action, you should give permissions on the Action tracking in your Google Account.
- Go to your Google Account.
- In the Privacy & personalization section, click Manage your data & personalization.

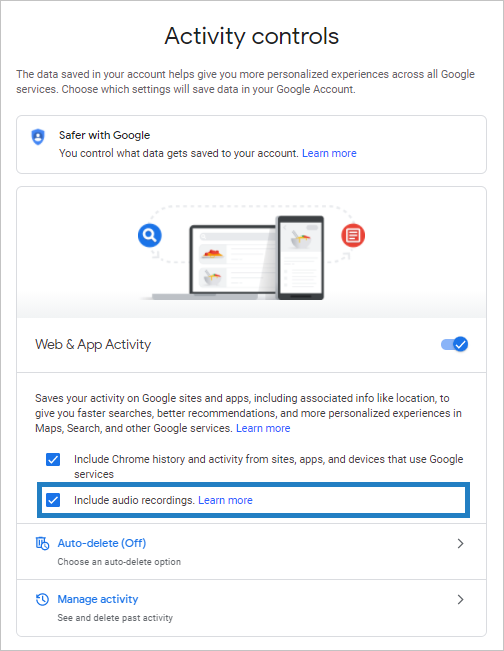
- In the Activity controls section, go to the Web & App Activity setting.

- Activate the Include audio recordings option.
Test your Action
Now you can test your Action using Google Assistant on any device you want.
To do it, open Google Assistant and run your Action using the invocation phrase you have set earlier.
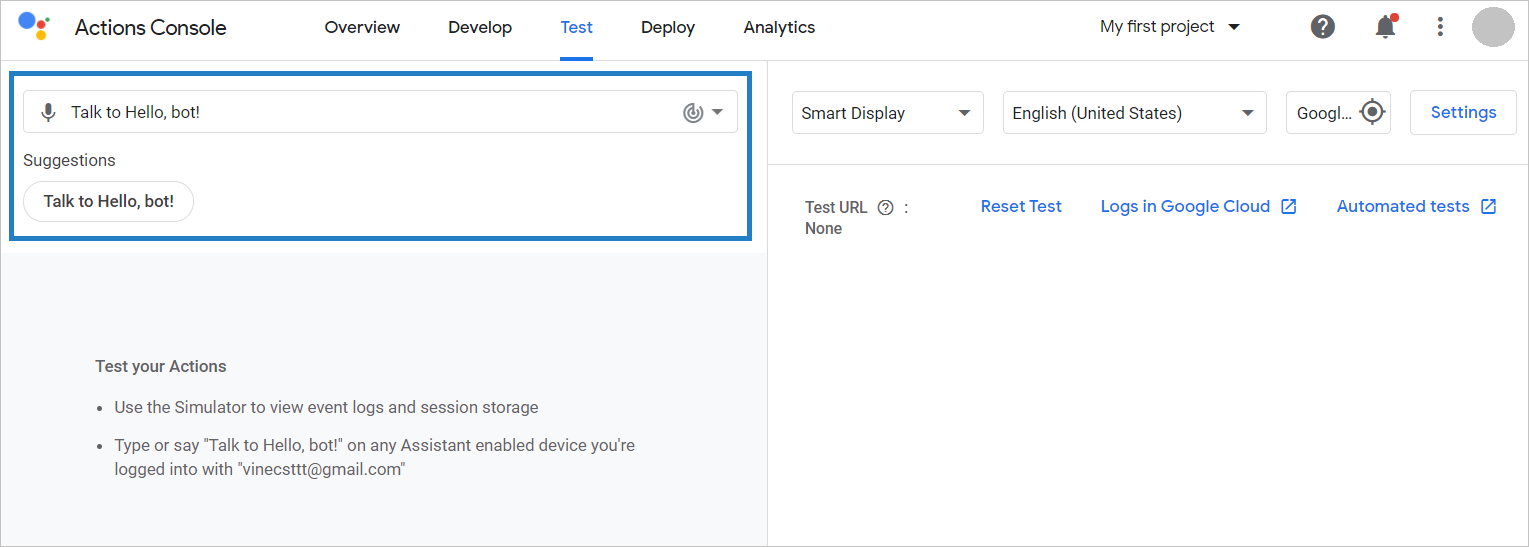
You can also test your Action in the Actions Console simulator. To do it, go to the Test tab and choose Talk to (your Action name).
Meet the Google Assistant requirements
Google Assistant has the list of restrictions and requirements for the Actions that should be taken into account when creating a script. Check them out and adjust your script as required.
Publish your Action
After you have convinced your script meets the Google Assistant requirements, go to the Overview tab of your project.
Before you publish your Action, you should complete all the steps. In this case, the last thing to do is to specify the information about the Action. To do it, click Enter information required for the Actions directory.
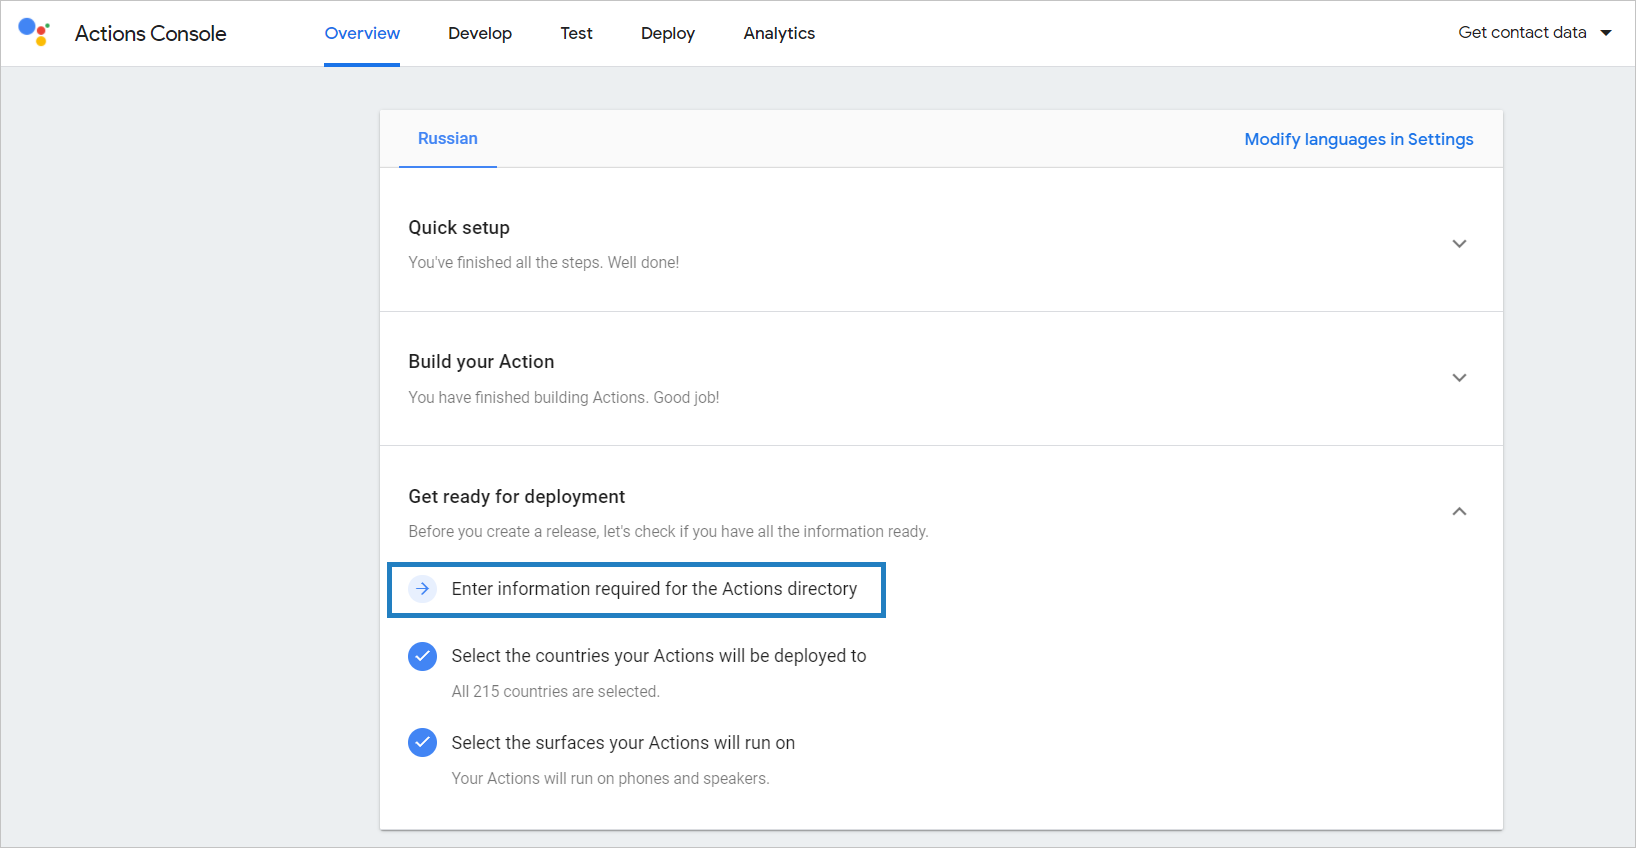
Here you should add the Action description, the logo, specify the URL for your privacy policy, and fill out other obligatory fields. After doing this, click Save.
Go back to the Overview tab and click Release. You will be transferred to the Deploy tab. Click Start new release.
In the modal window, fill out the fields:
- Channel — choose Production to make your Action available for all Assistant users.
- Release name — specify the name for the release.
When publishing the Action in the Production channel, specify you agree to the Google’s policy for Actions and confirm that you have tested your Action. You should also choose how you want to publish your Action — as a staged rollout or as a full rollout.
Click Submit.
Your Action will have an Under review status. It means the Action is under the Google’s review. After Google approves your Action, you can use it to communicate with real clients.